Esta es una pagina de Tecnologia

martes, 17 de diciembre de 2019

Desarrollo de sofware


Hola aqui les dejo un crud completo con ajax + codeIngiter + Bostrap

Para descargar el código vayan al enlace:
 
Share:

domingo, 8 de diciembre de 2019

Dota 2|Void Spirit y Snapfire han sido debilitados, sin aviso


Void Spirit y Snapfire
Los nuevos de héroes de dota 2 estrenados hace poco han estado recibiendo cambios sin que la comunidad se entere adecuadamente o públicamente se podría decir que fueron cambios internos.
La actualización "The Outlanders" llego hace poco menos de un mes a dota 2 modificando completamente como se conocía el juego. Ademas llegando dos nuevos héroes al juego Snapfire y Void Spirit que en este tiempo han recibido muchos cambios.

Void Spirit el más nerfeado esta ultima semana en Dota 2
El nuevo héroe de inteligencia es el cuarto espiritual elemental. Inai, Void Spirit, es un héroe muy fuerte para ocasionar daño mágico rápido y posee mucha supervivencia tras las ultimas mejoras que recibió. Esto lo aprovecharon los jugadores de rango divino-inmortal, pues en ese nivel el personaje tiene casi 60% de tasa de victorias lo cual es alto a diferencia de los otros héroes. 

Repasando las mejoras que le hicieron en la versión 7.23a:

- Incrementada Fuerza ganada por nivel de 2.5 a 2.8
- Astral Step: reducido tiempo de casteo de 0.4 a 0.2; incrementado rango de casteo de 600/800/1000 a 700/900/1100

Con más puntos de vida y menor tiempo de activación de su habilidad definitiva "Astral Step", pudo atraer a muchos jugadores que aprovecharon muy bien sus fortalezas como Core (puede ir de midlaner, safe y hasta offlaner). Donde fueron mas pikeados.

Días después de su apabullante incremento de victorias, ha recibido los siguientes nerfs el día 2 de diciembre:

- Dissimilate: reducido el daño de 140/220/300/380 a 120/200/280/360.
- Resonant Pulse: incrementado la recarga de 14 a 16; incrementado el coste de maná de 90/100/110/120 a 100/110/120/130.
- Talento de nivel 15: reducido daño extra de Resonant Pulse de 150 a 100.


A pesar de todos estos cambios el héroe siguió manteniendo su fuerza a tal punto que llevo a otra modificación.

La abuelita Snapfire no se salvó de los ajustes ocultos

Tambien denominada por muchos geymers como la mama de "sniper" también sufrió cambios.
El rol principal de Snapfire es Apoyo, para cumplir el rol no era suficientemente buena, no ganaba muchas partidas y tenía 45% de tasa de victorias. Por esa razón, recibió muchas mejoras en la versión 7.23a: para aumentar su numero de victorias y picks en cada partida. Sin embargo esto se les fue un poco de las manos y tuvieron que debilitarla en una nueva actualización.


- Lil' Shredder: incrementado costo de maná de 75 a 90; reducido el daño de 45/60/75/90 a 40/55/70/85; reducida velocidad de ataque ralentizada por acumulación de 20/25/30/35 a 15/20/25/30.
- Firesnap Cookie: reducido recarga de 24/22/20/18 a 24/21/18/15, incrementada la velocidad del proyectil de 800 a 1000; reducido tiempo de casteo a si mismo de 0.4 a 0.3.


Share:

domingo, 24 de noviembre de 2019

CYBERTUCK La Nueva Camioneta de "TESLA"


Tesla presenta su camioneta eléctrica 'Cibertruck'

Esta semana se dio un acontecimiento importante la empresa eléctrica mas grande de norteamericano de las cual es dueño "Elon Musk" y que tiene una nueva visión acerca del futuro de planeta y de su cuidado con los vehículos eléctricos presento su nueva camioneta denominada "Cibertruck" la cual se indico que es la camioneta mas compacta y fuerte que existe y con tecnología moderna y futurista.

Entrando a detalle un poco a la presentación que se dio y quien fue dirigido por el mismo "Elon Musk" se dieron detalles de vehículo como: 
La fabricada esta en acero inoxidable laminado en frío 30X Ultra-Hard. Es tan duro que prometen puede soportar golpes, abolladuras y corrosión, al mismo tiempo que garantiza la seguridad de sus ocupantes en su interior.
En cuantas a las ventanas se trata de un vidrio ultrafuerte compuesto por varias capas de polímeros. Según Musk, está preparado para “absorber y redirigir la fuerza de los impactos”.

Y bueno es que en plena presentación y frente a toso el publico se hizo la prueba de resistencia con uno de los asistentes, el cual consistía en lanzar una bola de acero hacia la ventana del vehículo para evidenciar lo resistente que era pero no se vio eso, ni bien el asistente lanzo la bola de acero, la venta termino rota a la cual "Elon Musk" indico de manera incomoda y tratando de disimular la situación que tal vez el golpe fue demasiado fuerte y bueno en un segundo intento y con menos fuerza dio el mismo resultando también quebrandoce la segunda ventana a lo cual Elon dijo hicimos pruebas con rocas, llaves, tubos y no había paso esto. Pero bueno a pesar de todo lo que trato de decir Elon en la presentación para pasar desapercibido este hecho fue blanco de criticas y burlas alrededor del mundo en la cual mencionaron "como es que una camioneta que se supone que es la mas resistente termina con las ventanas rotas".


Bueno a pesar de este incidente Elon dijo tener 146 000 pedidos de la camioneta.El costo de la camioneta sera de de $29,900.


Share:

viernes, 22 de noviembre de 2019

Dota 2


El equipo peruano antes llamado “Team Anvorgesa”  y ahora " Beastcoast" quienes se hiceron conocidos y famosos por su participación en la The International 2019 , el torneo anual de esports del campeonato mundial de Dota 2  en la cual obtuvieron el por la mano de "infamous" se coronaron entre los 8 mejores equipos del mundo llevandose un  premio mayor a los medio millón de dolares.

Y para la nueva temporada el equipo mas conocido como “Team Anvorgesa”deicidio fichar con " Beastcoast" en la cual harán su participación de esta manera en todos los torneos.

El equipo esta conformado por Hector Antonio Rodriguez “K1”, Jean Pierre Gonzales “Chris Brown”, Steven Vargas “StingeR”, Diego Rivera “Jericho” y el boliviano Adrian Cespedes “Wisper”.

Y aquí tenemos en vídeo promocional oficial.


Share:

lunes, 28 de octubre de 2019

Redmi Note 8

Redmi Note 8 y Redmi Note 8 Pro:  64 megapíxeles de la mano de la cuádruple cámara trasera
El nuevo redmi 8 presentado por la familia de "xiaomi" viene con Sistema operativo: Android,Tamaño de pantalla:6,3" en cuanto diseño tiene Alto:158,3 mm,Ancho:75,3 mm,Grosor:8,4 mm,Peso:190 g,Lector de huellas:SI -Trasero, y en Colores:Verde, Azul.
En cuanto a las Cámaras tenemos:
Cámara principal: Resolución: 48 MP,Apertura:f/1.8,Flash: Flash LED,Vídeo: UHD 4K
Cámara dual: Resolución: 8.0,Apertura:f/2.2
Cámara frontal: Resolución: 13.0,Apertura:f/2.0,Vídeo:Full HD 1080p

La batería viene con una capacidad de 4.000 mAh algo bastante bueno y que se destaca en un buen celular y a la cual ya estamos acostumbradas en la familia redmi, la batería es interna osea que no se puede extraer y viene con carga rapida de: Power Delivery 18W.

Bueno pasando al apartado de conectividad este móvil viene con USB: tipo C algo que se destaca a diferencia de sus hermanos menores o anteriores y tambien cuenta con un jack de audífonos, en la parte delantera viene con un sensor  de proximidad y de luz. Acepta tarjeta nano SIM y tiene compatibilidad con redes 4G algo seria su punto mas debil ya que se espera al ser un móvil de gama alta una conectividad de 5G a pesar que esta tecnología aun no se a aplicado en todas partes del mundo y solo algunos países la cuentan ,pero de todas maneras para este punto ya se esperaba una conectividad de 5G para este movil.


Share:

domingo, 27 de octubre de 2019

Películas Gratis

Hola aquí les traigo un tutorial de un sitio web donde pueden ver películas en alta definición  y audio latino..
Y lo mejor es que son películas en estreno y totalmente gratis no necesita registrarse ni usar ningún medio de pago..


Share:

iPhone 11


iPhone 11

Amor a primera, segunda, tercera, cuarta, quinta y sexta vista. Así es como apple decidió denominar a su nuevo teléfono que busca marcar un hito en los móviles. 

"Un sistema de dos cámaras para capturar más de lo que te gusta. El chip más rápido en un smartphone y una batería que dura todo el día para cargarlo menos y usarlo más. Y la máxima calidad de video en un smartphone para que tus recuerdos se vean espectaculares. El iPhone 11 lo tiene todo." Eso es todo lo que dijo apple en su presentación.

El nuevo iPhone 11 viene en seis variantes de color: púrpura, amarillo, verde, negro, blanco y producto ROJO.

Las dimensiones del iPhone 11 son 150.9 mm x 75.7 mm x 8.3 mm (H x W x D). Pesa alrededor de 194 gramos (6.84 onzas). Cuenta con una pantalla LCD de pantalla completa de 6.1 pulgadas y está alimentado por el nuevo chip biónico A13 de Apple con motor neuronal de tercera generación. La pantalla es la pantalla Liquid Retina HD patentada de la compañía que tiene capacidad Multi-Touch con tecnología IPS.

La resolución es de 1792x828 píxeles uno a 326 ppi con una relación de contraste de 1400: 1 (típica). Otras características especiales de la pantalla son True Tone, Wide color (P3) y Haptic touch. Viene recubierto con un recubrimiento oleofóbico resistente a huellas dactilares. 
En cuanto al segmento de la cámara, el iPhone 11 viene equipado con una cámara trasera doble de lente ancha de seis elementos de 12 MP y una lente ultra ancha de cinco elementos. La lente Ultra Wide viene con una apertura de ƒ / 2.4 y un campo de visión de 120 °, mientras que la cámara Wide tiene una apertura de ƒ / 1.8. El iPhone 11, junto con los otros dos modelos, tiene un modo nocturno para hacer clic en mejores imágenes en condiciones de poca luz. Algunas de las otras características de la cámara trasera son 2x de zoom óptico; zoom digital de hasta 5x, modo vertical con bokeh avanzado y control de profundidad, iluminación vertical con seis efectos, estabilización óptica de imagen (gran angular).

Ademas Apple ha actualizado la cámara selfie en los tres modelos de iPhones, desde una cámara de 7MP de profundidad real a un sensor TrueDepth de 12MP con apertura de ƒ / 2.2. Algunas de las otras características de la cámara frontal son el modo vertical con bokeh avanzado y control de profundidad, iluminación vertical con seis efectos, grabación de video 4K a 24 fps, 30 fps o 60 fps, grabación de video HD 1080p a 30 fps o 60 fps, etc.
En el apartado de los diversos sensores son Face ID, barómetro, giroscopio de tres ejes, acelerómetro, sensor de proximidad y sensor de luz ambiental para un reconocimiento facial avanzado. El iPhone 11 viene en tres variantes de almacenamiento: 64 GB, 128 GB y 256 GB.


créditos: Isa Marcial


Share:

sábado, 26 de octubre de 2019

Pixel 4


GOOGLE PIXEL 4 Y 4 XL: LO NUEVO DE GOOGLE CON LO CUAL ESPERA HACERLE LA COMPETENCIA A HUAWEI Y SANSUNG


Los últimos teléfonos inteligentes de Google están finalmente, realmente, oficialmente aquí: la compañía acaba de anunciar los Pixel 4 y Pixel 4 XL en su evento de hardware en la ciudad de Nueva York.

El Pixel 4 viene en tres nuevos colores: blanco, negro y una opción naranja de edición limitada.
El Pixel 4 XL tiene una pantalla Quad HD de 6.3 pulgadas, mientras que la pantalla del Pixel 4 de 5.7 pulgadas es 1080p. Ambos cuentan con una frecuencia de actualización máxima de 90Hz para un desplazamiento y una respuesta ultra suaves, pero la frecuencia de actualización se ajusta automáticamente a los 60Hz habituales en algunas circunstancias (donde ni siquiera lo notarías) para optimizar la duración de la batería.

Además del tamaño de la pantalla y la capacidad de la batería, los dos nuevos píxeles ofrecen especificaciones de hardware idénticas. Están alimentados por el procesador Snapdragon 855 de Qualcomm, vienen con 64 GB o 128 GB de almacenamiento y tienen 6 GB de RAM.


En el área del bisel superior del Pixel 4, Google ha alojado una serie de sensores que permiten dos nuevas funciones. Uno es el propio sistema de desbloqueo facial de Google, que es la respuesta de la compañía al Face ID de Apple. El otro es un nuevo método de interacción llamado Motion Sense. Esto permite que el Pixel 4 se controle con gestos con las manos, sin necesidad de tocar el teléfono. Motion Sense utiliza la tecnología Project Soli de Google. Con Motion Sense, puede hacer cosas como controlar la música o descartar una llamada entrante con un movimiento de su mano cerca de la pantalla del teléfono. El procesamiento de Motion Sense se realiza localmente en el dispositivo, y Google señaló que la función se puede desactivar en cualquier momento.

Share:

Huawei mate 30

Huawei Mate 30 Pro: el primer celular de Huawei con Android a medias estrena su cuádruple cámara y pantalla súper curvada y un reconocimiento facial avanzado 

El teléfono inteligente Huawei Mate 30 Pro se ejecuta en el sistema operativo Android v10 (Q). El teléfono funciona con procesador Octa core (2.86 GHz, Dual core, Cortex A76 + 2.09 GHz, Dual core, Cortex A76 + 1.86 GHz, Quad core, Cortex A55). Se ejecuta en el chipset HiSilicon Kirin 990. Tiene 8 GB de RAM y 256 GB de almacenamiento interno.

Y también  tiene una pantalla OLED. Mide 158.1 mm x 73.1 mm x 8.8 mm y pesa 198 gramos. La pantalla tiene una resolución de 1176 x 2400 píxeles y 409 ppi de densidad de píxeles. Tiene una relación de aspecto de 18.4: 9 y una relación pantalla-cuerpo de 94.06%. En el frente de la cámara, los compradores obtienen una cámara frontal de 32 MP y en la parte trasera, hay una cámara de 40MP + 40MP + 8MP con características como 30 x Zoom digital, 3 x Zoom óptico, Flash automático, Detección de rostros, Toque para enfocar. Está respaldado por una batería de 4500 mAh. Las características de conectividad en el teléfono inteligente incluyen WiFi, Bluetooth, GPS, Volte, NFC y más.

En cuanto a las opciones de color, el teléfono inteligente Huawei Mate 30 Pro puede venir en colores negro, verde esmeralda, plata espacial y púrpura cósmico.

A continuación el Review para mayor detalle.


Creditos: Isa Marcial

Share:

lunes, 14 de octubre de 2019

cubo de Colores en Ejes OPenGL


====Codigo==========
#include <windows.h>
#ifdef __APPLE__
#include <GLUT/glut.h>
#else
#include <GL/glut.h>
#endif
#include <stdlib.h>

static void display(void)
{
    glClearColor(0,0,0,1);
    glClear(GL_COLOR_BUFFER_BIT | GL_DEPTH_BUFFER_BIT);

    glShadeModel(GL_FLAT);
    glLineStipple(1, 0x00FF);
    glEnable(GL_LINE_STIPPLE);

    glBegin(GL_LINES);
    {
//EJE X ROJO
        glColor3f(1.0,0.0,0.0);
        glVertex3f(-0.7,0.3,0.0);
        glVertex3f(0.7,-0.3,0.0);
//EJE Y VERDE
        glColor3f(0.0,1.0,0.0);
        glVertex3f(0.0,-0.7,0.0);
        glVertex3f(0.0,0.7,0.0);
//EJE Z AZUL
        glColor3f(0.0,0.0,1.0);
        glVertex3f(-0.7,-0.4,0.0);
        glVertex3f(0.7,0.4,0.0);
    }
    glEnd();

    //CUBO SOLIDO
    glPushMatrix();
        glColor3f(1.0,1.0,0.0);
        glRotatef(120.0,9.0,-12.0,0.0);
        glutSolidCube(0.3);
    glPopMatrix();

    //ESFERA VERDE SOLIDO
    glPushMatrix();
        glColor3f(0.0,1.0,0.0);
        glTranslatef(0.0,-0.33,0.0);
        glutSolidSphere(0.08,16,16);
    glPopMatrix();

    //ESFERA ROJO SOLIDO
    glPushMatrix();
        glColor3f(1.0,0.0,0.0);
        glTranslatef(-0.29,0.13,0.0);
        glutSolidSphere(0.08,16,16);
    glPopMatrix();

    //ESFERA AZUL SOLIDO
    glPushMatrix();
        glColor3f(0.0,0.0,1.0);
        glTranslatef(0.28,0.15,0.0);
        glutSolidSphere(0.08,16,16);
    glPopMatrix();

    //TORO VERDE
    glPushMatrix();
        glColor3f(0.0,1.0,0.0);
        glTranslatef(0.009,0.6,0.0);
        glRotatef(-60,-0.0001,0.003,0.0);
        glutSolidTorus(0.05,0.18,16,16);
    glPushMatrix();

    //TORO ROJO
    glPushMatrix();
        glColor3f(1.0,0.0,0.0);
        glTranslatef(1.03,-0.81,0.0);
        glRotatef(60,0.015,0.009,0.0);
        glutSolidTorus(0.05,0.18,16,16);
    glPushMatrix();

    //TORO AZUL
    glPushMatrix();
        glColor3f(0.0,0.0,1.0);
        glTranslatef(-1.05,0.3,0.0);
        glRotatef(-50,-0.00005,0.4,0.0);
        glutSolidTorus(0.06,0.14,12,12);
    glPushMatrix();

    glutSwapBuffers();
}

int main(int argc, char *argv[])
{
    glutInit(&argc, argv);
    glutInitDisplayMode(GLUT_RGB | GLUT_DOUBLE | GLUT_DEPTH);
    glutInitWindowSize(512,512);
    glutInitWindowPosition(20,20);
    glutCreateWindow("Plano Cartesiano");

    glutDisplayFunc(display);

    glutMainLoop();
    return EXIT_SUCCESS;
}

Share:

viernes, 4 de octubre de 2019

CLISP Ejercicios IA

Hola aquí les dejo algunos ejercicios en  GNU CLISP


LINK DE DESCARGA DE ARCHIVO   https://drive.google.com/file/d/14E_i0gUpCmcgwNYvKg_74JpLSwHhZXjc/view?usp=sharing
Share:

Iniciales 2D OpenGL

Hola aquí les traigo las iniciales en 2D


====código=====
#include <windows.h>
#ifdef __APPLE__
#include <GLUT/glut.h>
#else
#include <GL/glut.h>
#endif

#include <stdlib.h>


static void display(void)
{
    glClearColor(1,1,1,0);
    glClear(GL_COLOR_BUFFER_BIT | GL_DEPTH_BUFFER_BIT);

    typedef GLfloat point2[2];
      point2 vertice[54] = {
      {100.0,100.0},    //v0
      {200.0,100.0},    //v1
      {320.0,400.0},    //v2
      {250.0,400.0},    //v3

      {200.0,300.0},    //v4
      {150.0,400.0},    //v5
      {80.0,400.0},    //v6
      {150.0,200.0},    //v7

      {100.0,380.0},    //v8
      {180.0,320.0},    //v9
      {40.0,350.0},    //v10
      {100.0,200.0},    //v11
      {50.0,130.0}, //v12

      //vertices para la letra s

      {400.0,100.0},    //v13
      {700.0,100.0},    //v14
      {700.0,260.0},    //v15
      {500.0,260.0},    //v16
      {500.0,320.0},   //v17
      {700.0,320.0},    //v18
      {700.0,370.0},    //v19
      {400.0,370.0},    //v20
      {400.0,210.0},    //v21
      {600.0,210.0},   //v22
      {600.0,150.0},    //v23
      {400.0,150.0},    //v24
      //FONDO
      {500.0,400.0},   //v25
      {750.0,400.0},    //v26
      {750.0,350.0},    //v27
      {580.0,280.0},   //v28
      {750.0,280.0},    //v29
      {750.0,150.0},    //v30
      {580.0,320.0},   //v31
      {480.0,180.0},    //v32
      {600.0,180.0},   //v33

      //Letra Q

      {880.0,370.0},    //v34
      {1400.0,370.0},   //35

      {880.0,330.0},   //v36
      {1400.0,330.0},    //v37

      {1100.0,330},   //v38
      {1250.0,330},    //v39  --

      {1100.0,180},   //v40
      {1250.0,100},    //v41--

      {880.0,100},   //42
      {880.0,180},    //v43

      //FONDO
      {780.0,390.0},    //V44
      {1300.0,390.0},   //V45

      {780.0,350.0},   //V46
      {780.0,200.0},    //V47

      {1000.0,330},   //V48  ---
      {1000.0,200},    //V49

      {780.0,150},   //V50


      };

    glColor3f(0.0,0.0,1.0);
    gluOrtho2D(0.0, 1800.0, 0.0, 500.0);


    //Letra S

    glColor3f(1.0,0.0,0.0);
  glBegin(GL_LINES);

  glVertex2fv(vertice[13]);
  glVertex2fv(vertice[14]);

  glVertex2fv(vertice[14]);
  glVertex2fv(vertice[15]);

  glVertex2fv(vertice[15]);
  glVertex2fv(vertice[16]);

  glVertex2fv(vertice[16]);
  glVertex2fv(vertice[17]);

  glVertex2fv(vertice[17]);
  glVertex2fv(vertice[18]);

  glVertex2fv(vertice[18]);
  glVertex2fv(vertice[19]);

  glVertex2fv(vertice[19]);
  glVertex2fv(vertice[20]);

   glVertex2fv(vertice[20]);
  glVertex2fv(vertice[21]);

  glVertex2fv(vertice[21]);
  glVertex2fv(vertice[22]);

  glVertex2fv(vertice[22]);
  glVertex2fv(vertice[23]);

  glVertex2fv(vertice[23]);
  glVertex2fv(vertice[24]);

  glVertex2fv(vertice[24]);
  glVertex2fv(vertice[13]);
  //fondo

  glVertex2fv(vertice[20]);
  glVertex2fv(vertice[25]);

  glVertex2fv(vertice[25]);
  glVertex2fv(vertice[26]);

  glVertex2fv(vertice[26]);
  glVertex2fv(vertice[27]);

  glVertex2fv(vertice[26]);
  glVertex2fv(vertice[19]);

  glVertex2fv(vertice[27]);
  glVertex2fv(vertice[18]);

  glVertex2fv(vertice[27]);
  glVertex2fv(vertice[18]);

  glVertex2fv(vertice[28]);
  glVertex2fv(vertice[29]);

  glVertex2fv(vertice[28]);
  glVertex2fv(vertice[31]);

  glVertex2fv(vertice[28]);
  glVertex2fv(vertice[16]);

  glVertex2fv(vertice[15]);
  glVertex2fv(vertice[29]);

  glVertex2fv(vertice[29]);
  glVertex2fv(vertice[30]);

  glVertex2fv(vertice[30]);
  glVertex2fv(vertice[14]);

  glVertex2fv(vertice[24]);
  glVertex2fv(vertice[32]);

  glVertex2fv(vertice[32]);
  glVertex2fv(vertice[33]);
  glEnd();

  //Letra J

   glLineStipple(1,0x00FF);
    glEnable(GL_LINE_STIPPLE);  //esto es la linea entrecortada

  glColor3f(0.0,0.0,1.0);
  glBegin(GL_LINES);
  glVertex2fv(vertice[34]);
  glVertex2fv(vertice[35]);

  glVertex2fv(vertice[35]);
  glVertex2fv(vertice[37]);

  glVertex2fv(vertice[37]);
  glVertex2fv(vertice[39]);

  glVertex2fv(vertice[34]);
  glVertex2fv(vertice[36]);

  glVertex2fv(vertice[36]);
  glVertex2fv(vertice[38]);  //

  glVertex2fv(vertice[38]);
  glVertex2fv(vertice[40]);

  glVertex2fv(vertice[39]);
  glVertex2fv(vertice[41]);

  glVertex2fv(vertice[41]);
  glVertex2fv(vertice[42]); //

  glVertex2fv(vertice[42]);
  glVertex2fv(vertice[43]);

  glVertex2fv(vertice[43]);
  glVertex2fv(vertice[40]);

    //FONDO
  glVertex2fv(vertice[35]);
  glVertex2fv(vertice[45]);

  glVertex2fv(vertice[45]);
  glVertex2fv(vertice[44]);

  glVertex2fv(vertice[44]);
  glVertex2fv(vertice[46]);

  glVertex2fv(vertice[44]);
  glVertex2fv(vertice[34]);

  glVertex2fv(vertice[46]);
  glVertex2fv(vertice[36]);

  glVertex2fv(vertice[48]);
  glVertex2fv(vertice[49]);

  glVertex2fv(vertice[49]);
  glVertex2fv(vertice[40]);

  glVertex2fv(vertice[49]);
  glVertex2fv(vertice[47]);

  glVertex2fv(vertice[47]);
  glVertex2fv(vertice[43]);

  glVertex2fv(vertice[47]);
  glVertex2fv(vertice[50]);

  glVertex2fv(vertice[50]);
  glVertex2fv(vertice[42]);

  glEnd();
      glutSwapBuffers();
}
int main(int argc, char *argv[])
{
    glutInit(&argc, argv);
    glutInitDisplayMode(GLUT_RGB | GLUT_DOUBLE | GLUT_DEPTH);
    glutInitWindowSize(512,512);
    glutInitWindowPosition(20,20);
    glutCreateWindow("Letras 2D");
    glutDisplayFunc(display);
    glutMainLoop();
    return EXIT_SUCCESS;
}


Share:

Iniciales Arco iris OpenGL

Hola aquí les traigo las iniciales de ingeniería informática y sistemas de colores al igual que un arco iris


=====codigo===========
#include <windows.h>
#ifdef __APPLE__
#else
#include <GL/glut.h>
#endif

#include <stdlib.h>

static void display(void)
{
    glClearColor(0,0,0,0);
    glClear(GL_COLOR_BUFFER_BIT | GL_DEPTH_BUFFER_BIT);

    glShadeModel (GL_SMOOTH);

    //I1
    glBegin(GL_QUADS);
        glColor3f(1.0,0.0,0.0);
        glVertex2f(-0.8,-0.8);
        glColor3f(0.0,1.0,0.0);
        glVertex2f(-0.8,0.8);
        glColor3f(0.0,0.0,1.0);
        glVertex2f(-0.4,0.8);
        glColor3f(1.0,0.0,0.0);
        glVertex2f(-0.4,-0.8);
    glEnd();

    //I2
    glBegin(GL_QUADS);
        glColor3f(1.0,0.2,0.0);
        glVertex2f(-0.2,-0.8);
        glColor3f(0.0,1.0,0.0);
        glVertex2f(-0.2,0.8);
        glColor3f(0.0,0.0,1.0);
        glVertex2f(0.2,0.8);
        glColor3f(1.0,0.0,0.0);
        glVertex2f(0.2,-0.8);
    glEnd();

    //S
    //barra horizontal arriba
    glBegin(GL_QUADS);
        glColor3f(1.0,0.0,0.0);
        glVertex2f(0.4,0.8);
        glColor3f(0.0,1.0,0.0);
        glVertex2f(0.8,0.8);
        glColor3f(0.0,0.0,1.0);
        glVertex2f(0.8,0.6);
        glColor3f(1.0,0.0,0.0);
        glVertex2f(0.4,0.6);
    glEnd();

    glBegin(GL_QUADS);
        glColor3f(1.0,0.0,0.0);
        glVertex2f(0.4,0.6);
        glColor3f(0.0,1.0,0.0);
        glVertex2f(0.6,0.6);
        glColor3f(0.0,0.0,1.0);
        glVertex2f(0.6,0.0);
        glColor3f(1.0,0.0,1.0);
        glVertex2f(0.4,0.0);
    glEnd();


    glBegin(GL_QUADS);
        glColor3f(1.0,0.0,0.0);
        glVertex2f(0.6,0.0);
        glColor3f(0.0,1.0,0.0);
        glVertex2f(0.8,0.0);
        glColor3f(0.0,0.0,1.0);
        glVertex2f(0.8,-0.6);
        glColor3f(1.0,0.0,1.0);
        glVertex2f(0.6,-0.6);
    glEnd();


    //barra horizontal debajo
    glBegin(GL_QUADS);
        glColor3f(1.0,0.0,0.0);
        glVertex2f(0.4,-0.8);
        glColor3f(0.0,1.0,0.0);
        glVertex2f(0.4,-0.6);
        glColor3f(0.0,0.0,1.0);
        glVertex2f(0.8,-0.6);
        glColor3f(1.0,0.0,1.0);
        glVertex2f(0.8,-0.8);
    glEnd();

    //barra del centro
    glBegin(GL_QUADS);
        glColor3f(1.0,0.0,0.0);
        glVertex2f(0.4,0.1);
        glColor3f(0.0,1.0,0.0);
        glVertex2f(0.4,-0.1);
        glColor3f(0.0,0.0,1.0);
        glVertex2f(0.8,-0.1);
        glColor3f(1.0,0.0,1.0);
        glVertex2f(0.8,0.1);
    glEnd();

    glutSwapBuffers();
}

int main(int argc, char *argv[])
{
    glutInit(&argc, argv);
    glutInitDisplayMode(GLUT_RGB | GLUT_DOUBLE | GLUT_DEPTH);
    glutInitWindowSize(640,480);
    glutInitWindowPosition(10,10);
    glutCreateWindow("Cubo");

    //glutReshapeFunc(resize);
    glutDisplayFunc(display);

    glutMainLoop();

    return EXIT_SUCCESS;
}

Share:

Formación de Cubos OpennGL

Hola aquí les traigo la formación de cubos de colores en los tres ejes de forma vertical y circular


====codigo========
/*
 * GLUT Shapes Demo
 *
 * Written by Nigel Stewart November 2003
 *
 * This program is test harness for the sphere, cone
 * and torus shapes in GLUT.
 *
 * Spinning wireframe and smooth shaded shapes are
 * displayed until the ESC or q key is pressed.  The
 * number of geometry stacks and slices can be adjusted
 * using the + and - keys.
 */
#include<windows.h>
#ifdef __APPLE__
#include <GLUT/glut.h>
#else
#include <GL/glut.h>
#endif

#include <stdlib.h>

static int slices = 16;
static int stacks = 16;

/* GLUT callback Handlers */

static void display(void)
{
glClearColor(0,0,0,1);//pantalla color negro
glClear(GL_COLOR_BUFFER_BIT | GL_DEPTH_BUFFER_BIT);
  //Dibujando ejes
 glBegin(GL_LINES);
 glColor3f(1.0f, 0.0f, 0.0f);//Rojo Eje X
 glVertex3f(0.0f, 0.0f, 0.0f);
 glVertex3f(2.0f, 0.0f, 0.0f);
 glColor3f(0.0f, 1.0f, 0.0f);//verde Eje Y
 glVertex3f(0.0f, 0.0f, 0.0f);
 glVertex3f(0.0f, 2.0f, 0.0f);
 glColor3f(0.0f, 0.0f, 1.0f);//azul Eje Z
 glVertex3f(0.0f, 0.0f, 0.0f);
 glVertex3f(0.0f, 0.0f, 2.0f);
 glEnd();

glColor3f(0.0f, 0.0f, 1.0f); //dibujos en color gris
 //Dibujando el objeto
 for (GLint i=0; i<10; i++) {
 glPushMatrix();
 glRotatef(i * 360 / 10, 0.0f, 1.0f, 0.0f);
 glTranslatef(0.3f, 0.0f, 0.0f);
 glutSolidSphere(0.1, 30, 30);
 //glutWireTeapot(0.25);
 glPopMatrix();
 }
glColor3f(1.0f, 0.0f, 0.0f); //dibujos en color gris
 //Dibujando el objeto
 for (GLint i=0; i<10; i++) {
 glPushMatrix();
 glRotatef(i * 360 / 10, 0.0f, 1.0f, 0.0f);
 glTranslatef(0.7f, 0.0f, 0.0f);
 glTranslatef(0.0f, 1.0f, 0.0f);
 //glutWireTeapot(0.25);
 glutWireCube(0.2);
 glutSolidCube(0.2);
 //glColor3b(1.0f, 0.0f, 0.0f);
 glPopMatrix();

 }

glColor3f(0.0f, 1.0f, 0.0f); //dibujos en color verde
 //Dibujando el objeto
 for (GLint i=0; i<10; i++) {
 glPushMatrix();
 glRotatef(i * 360 / 10, 0.0f, 1.0f, 0.0f);
 glTranslatef(0.8f, 0.0f, 1.0f);
 glTranslatef(0.0f, 2.0f, 0.0f);
 //glutWireTeapot(0.25);
 glutWireCube(0.2);
 glutSolidCube(0.2);
 glPopMatrix();

 }
 //glutWireTeapot(0.5);
 glutSwapBuffers();
}


// Funcion que actua sobre la Pantalla
void reshape(int width, int height){
 glViewport(0,0,width,height);
 glMatrixMode(GL_PROJECTION);
 glLoadIdentity();
 gluPerspective(90.0,1,1.0,128.0);
 glMatrixMode(GL_MODELVIEW);
 glLoadIdentity();
 gluLookAt(2.5,3.5,2.0,0.0,0.0,0.0,0.0,1.0,0.0);
}
int main(int argc, char *argv[])
{
 glutInit(&argc, argv);
 glutInitDisplayMode(GLUT_RGB | GLUT_DOUBLE | GLUT_DEPTH);
 glutInitWindowPosition(20,20);
 glutInitWindowSize(500,500);
 glutCreateWindow("Transformaciones OpenGL");
 glutDisplayFunc(display);
 glutReshapeFunc(reshape);
 glutMainLoop();
 return EXIT_SUCCESS;
}

Share:

Formación de cubos OpenGL

Hola aquí les dejo el código que como pueden agregar un grupo de cubos en una circunferencia y formar una figura


====codigo====


/*
 * GLUT Shapes Demo
 *
 * Written by Nigel Stewart November 2003
 *
 * This program is test harness for the sphere, cone
 * and torus shapes in GLUT.
 *
 * Spinning wireframe and smooth shaded shapes are
 * displayed until the ESC or q key is pressed.  The
 * number of geometry stacks and slices can be adjusted
 * using the + and - keys.
 */
#include<windows.h>
#ifdef __APPLE__
#include <GLUT/glut.h>
#else
#include <GL/glut.h>
#endif

#include <stdlib.h>

static int slices = 16;
static int stacks = 16;

/* GLUT callback Handlers */

static void display(void)
{
glClearColor(0,0,0,1);//pantalla color negro
glClear(GL_COLOR_BUFFER_BIT | GL_DEPTH_BUFFER_BIT);
  //Dibujando ejes
 glBegin(GL_LINES);
 glColor3f(1.0f, 0.0f, 0.0f);//Rojo Eje X
 glVertex3f(0.0f, 0.0f, 0.0f);
 glVertex3f(2.0f, 0.0f, 0.0f);
 glColor3f(0.0f, 1.0f, 0.0f);//verde Eje Y
 glVertex3f(0.0f, 0.0f, 0.0f);
 glVertex3f(0.0f, 2.0f, 0.0f);
 glColor3f(0.0f, 0.0f, 1.0f);//azul Eje Z
 glVertex3f(0.0f, 0.0f, 0.0f);
 glVertex3f(0.0f, 0.0f, 2.0f);
 glEnd();

glColor3f(0.0f, 0.0f, 1.0f); //dibujos en color gris
 //Dibujando el objeto
 for (GLint i=0; i<10; i++) {
 glPushMatrix();
 glRotatef(i * 360 / 10, 0.0f, 1.0f, 0.0f);
 glTranslatef(0.3f, 0.0f, 0.0f);
 glutSolidSphere(0.1, 30, 30);
 //glutWireTeapot(0.25);
 glPopMatrix();
 }
glColor3f(1.0f, 0.0f, 0.0f); //dibujos en color gris
 //Dibujando el objeto
 for (GLint i=0; i<10; i++) {
 glPushMatrix();
 glRotatef(i * 360 / 10, 0.0f, 1.0f, 0.0f);
 glTranslatef(0.8f, 0.0f, 0.0f);
 //glTranslatef(0.0f, 1.0f, 0.0f);
 //glutWireTeapot(0.25);
 glutWireCube(0.2);
 glutSolidCube(0.2);
 //glColor3b(1.0f, 0.0f, 0.0f);
 glPopMatrix();

 }

glColor3f(0.0f, 1.0f, 0.0f); //dibujos en color verde
 //Dibujando el objeto
 for (GLint i=0; i<10; i++) {
 glPushMatrix();
 glRotatef(i * 360 / 10, 0.0f, 1.0f, 0.0f);
 glTranslatef(0.9f, 0.0f, 1.0f);
 //glTranslatef(0.0f, 1.0f, 0.0f);
 //glutWireTeapot(0.25);
 glutWireCube(0.2);
 glutSolidCube(0.2);
 glPopMatrix();

 }
 //glutWireTeapot(0.5);
 glutSwapBuffers();
}


// Funcion que actua sobre la Pantalla
void reshape(int width, int height){
 glViewport(0,0,width,height);
 glMatrixMode(GL_PROJECTION);
 glLoadIdentity();
 gluPerspective(90.0,1,1.0,128.0);
 glMatrixMode(GL_MODELVIEW);
 glLoadIdentity();
 gluLookAt(2.5,2.5,2.0,0.0,0.0,0.0,0.0,1.0,0.0);
}
int main(int argc, char *argv[])
{
 glutInit(&argc, argv);
 glutInitDisplayMode(GLUT_RGB | GLUT_DOUBLE | GLUT_DEPTH);
 glutInitWindowPosition(20,20);
 glutInitWindowSize(500,500);
 glutCreateWindow("Transformaciones OpenGL");
 glutDisplayFunc(display);
 glutReshapeFunc(reshape);
 glutMainLoop();
 return EXIT_SUCCESS;
}

Share:

sábado, 21 de septiembre de 2019

Sistema Solar en OpenGL

Hola aquí les traigo el código del sistema solar en OpenGL  ...espero que les sirva...


#include<windows.h>
#ifdef __APPLE__
#include <GLUT/glut.h>
#else
#include <GL/glut.h>
#endif

#include <stdlib.h>
#include<time.h>
#include <math.h>

int rad=100;


void circuloc(int x, int y, int t, int radio)
{
    int angulo=0;
    glPointSize(t);
    glBegin(GL_POINTS);
    glVertex2f(x,y);
    for(angulo=0;angulo<=360;angulo+=1)
    {

        glVertex2f(x+sin(angulo)*radio,y+cos(angulo)*radio);

    }
    glEnd();
}


void dibujar()
{
        glClear(GL_COLOR_BUFFER_BIT|GL_DEPTH_BUFFER_BIT);
        glColor3f(1.0,0.0,0.0);
        glColor3f(1.0,1.0,1.0);

        circuloc(0,0,1,310);
        circuloc(0,0,1,280);
        circuloc(0,0,1,250);
        circuloc(0,0,1,220);
        circuloc(0,0,1,190);
        circuloc(0,0,1,160);
        circuloc(0,0,1,130);
        circuloc(0,0,1,100);
        circuloc(0,0,1,70);


}

      // inicializando de variables

      GLfloat rotA=0,rot1=0,rot2=0,rot3=0,rot4=0,rot5=0,rot6=0,rot7=0,rot8=0;
      GLfloat rdS=30,
        rd1=6,
        rd2=12,
        rd3=9,
        rd4=6,
        rd5=18,
        rd6=15,
        rd7=12,
        rd8=12;
      GLfloat posx=0,posz=0;

//Inicializacion de variables para iluminacion

      GLfloat mat_diffuse [] = {0.0, 0.0, 0.0, 1.0};
      GLfloat mat_specular [] = {0.5, 0.5, 0.5, 1.0};
      GLfloat mat_shininess [] = {50};
      GLfloat mat_emission [] = {0.5, 0.2, 0.2, 1.0};

void resize(int width, int height)
{
    glViewport(0, 0, width, height);

    glMatrixMode(GL_PROJECTION);
    glLoadIdentity();
    glOrtho(-300,300,-300,300,-300,300);
    glMatrixMode(GL_MODELVIEW);
    glLoadIdentity();//matriz identidad
    glEnable(GL_DEPTH_TEST);
    glDepthFunc(GL_LEQUAL);

}

        //iluminacion

void iluminacion ()
{
GLfloat light_position[] = {1.0, 1.0, 1.0, 0.0};
glLightfv(GL_LIGHT0,GL_POSITION, light_position);

glMaterialfv(GL_FRONT, GL_DIFFUSE, mat_diffuse);
glMaterialfv(GL_FRONT, GL_SPECULAR, mat_specular);
glMaterialfv(GL_FRONT, GL_SHININESS, mat_shininess);
glMaterialfv(GL_FRONT, GL_EMISSION, mat_emission);
glEnable (GL_LIGHTING);
glEnable (GL_LIGHT0);
glEnable(GL_COLOR_MATERIAL);

}

    //CREACION DE LOS PLANETAS

void sol()
{
     glColor3f(1.0,1.0,0.0);
     glutSolidSphere(rdS,60,60);
}
void mercurio()
{
     glColor3f(0.4,0.4,0.4);
     glutSolidSphere(rd1,60,60);
}
void venus()
{
     glColor3f(1.0,0.2,0.0);
     glutSolidSphere(rd2,60,60);
}
void tierra()
{
     glColor3f(0.0,0.4,1.0);
     glutSolidSphere(rd3,60,60);
}
void marte()
{
     glColor3f(0.2,0.4,0.3);
     glutSolidSphere(rd4,60,60);
}
void jupiter()
{
     glColor3f(0.2,0.2,0.2);
     glutSolidSphere(rd5,60,60);
}
void saturno()
{
     glColor3f(1.0,0.4,0.0);
     glutSolidSphere(rd6,60,60);
}
//----------------------------------//
void urano()
{
     glColor3f(0.2,1.0,0.2);
     glutSolidSphere(rd7,60,60);
}
void anillos()
{
     glColor3f(1,0.6,0);
     glRotatef(rotA,1,0,1);
     glutSolidTorus(3, 20, 10,50);
}
//----------------------------------//
void neptuno()
{
     glColor3f(0.0,0.0,1.0);
     glutSolidSphere(rd8,60,60);
}

//-------------------------------------//


    //CREACION DE LA ESCENA

void display()
{
     glClear(GL_COLOR_BUFFER_BIT | GL_DEPTH_BUFFER_BIT);
     glLoadIdentity();
     gluLookAt(1.0,1.0,1.0,0.0,0.0,0.0,0.0,1.0,0.0);
     iluminacion ();
    dibujar();
     sol();

     glPushMatrix();
     glRotatef(rot1,0,1,0);
     glTranslatef(-40,0,0); //rotacion y traslacion para mercurio
     mercurio();
     glPopMatrix();

     glPushMatrix();
     glRotatef(rot2,0,1,0);
     glTranslatef(60,0,0);//rotacion y traslacion para mercurio
     venus();
     glPopMatrix();

     glPushMatrix();
     glRotatef(rot3,0,1,0);
     glTranslatef(0,0,-80);//rotacion y tralacion para tierra
     tierra();
     glPopMatrix();

     glPushMatrix();
     glRotatef(rot4,0,1,0);
     glTranslatef(100,0,0);//rotacion y traslacion para marte
     marte();
     glPopMatrix();

     glPushMatrix();
     glRotatef(rot5,0,1,0);
     glTranslatef(-120,0,0);//rotacion y traslacion para jupiter
     jupiter();
     glPopMatrix();

     glPushMatrix();
     glRotatef(rot6,0,1,0);
     glTranslatef(0,0,160);//rotacion y traslacion para saturno y anillo
     saturno();
     anillos();
     glPopMatrix();


     glPushMatrix();
     glRotatef(rot7,0,1,0);
     glTranslatef(-170,0,0);//rotacion y traslacion para urano
     urano();
     glPopMatrix();

     glPushMatrix();
     glRotatef(rot8,0,1,0);
     glTranslatef(190,0,0);//rotacion y traslacion para neptuno
     neptuno();
     glPopMatrix();

     rotA=rotA+0.03;
     rot1=rot1+0.1;
     rot2=rot2+0.015;
     rot3=rot3+0.013;
     rot4=rot4+0.05;
     rot5=rot5+0.04;
     rot6=rot6+0.03;
     rot7=rot7+0.02;
     rot8=rot8+0.01;

     glutSwapBuffers();
}

    //MANEJO DE CAMARA

void key(unsigned char key, int x, int y)    //funcion para uso del teclado
{
    switch(key)
    {
          case 27 :
            exit(0);
            break;
        default:
            break;
    }

glutPostRedisplay();    //redibuja el display
}


void idle()
{
    glutPostRedisplay();//redibuja el display
}


int main (int argc, char *argv[])
{
    glutInit(&argc, argv);
    glutInitWindowSize(950,700);//tamaño de la ventana
    glutInitWindowPosition(0,0);
    glutInitDisplayMode(GLUT_RGB | GLUT_DOUBLE | GLUT_DEPTH);
    glutCreateWindow("SISTEMA PLANETARIO SOLAR");
    glClearColor(0,0,0,0);
    glutReshapeFunc(resize);
    glutDisplayFunc(display);
    glutKeyboardFunc(key);
    glutIdleFunc(idle);

    glutMainLoop();
    return 0;
}

Share:

Cubo de Colores OpenGL

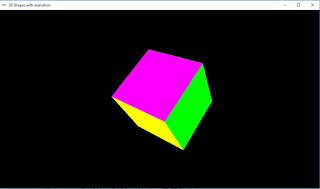
Hola aquí les traigo la animación en OpenGL de cubo en rotacion y que cambie de color según va girando...espero que les ayude ;)


El código aqui...

/*
 * OGL02Animation.cpp: 3D Shapes with animation
 */
#include <windows.h>  // for MS Windows
#include <GL/glut.h>  // GLUT, include glu.h and gl.h

/* Global variables */
char title[] = "3D Shapes with animation";
//GLfloat anglePyramid = 0.0f;  // Rotational angle for pyramid [NEW]
GLfloat angleCube = 0.0f;     // Rotational angle for cube [NEW]
int refreshMills = 15;        // refresh interval in milliseconds [NEW]

/* Initialize OpenGL Graphics */
void initGL() {
   glClearColor(0.0f, 0.0f, 0.0f, 1.0f); // Set background color to black and opaque
   glClearDepth(1.0f);                   // Set background depth to farthest
   glEnable(GL_DEPTH_TEST);   // Enable depth testing for z-culling
   glDepthFunc(GL_LEQUAL);    // Set the type of depth-test
   glShadeModel(GL_SMOOTH);   // Enable smooth shading
   glHint(GL_PERSPECTIVE_CORRECTION_HINT, GL_NICEST);  // Nice perspective corrections
}

/* Handler for window-repaint event. Called back when the window first appears and
   whenever the window needs to be re-painted. */
void display() {
   glClear(GL_COLOR_BUFFER_BIT | GL_DEPTH_BUFFER_BIT); // Clear color and depth buffers
   glMatrixMode(GL_MODELVIEW);     // To operate on model-view matrix

   // Render a color-cube consisting of 6 quads with different colors
   glLoadIdentity();                 // Reset the model-view matrix
   glTranslatef(0.2f, 0.0f, -7.0f);  // Move right and into the screen
   glRotatef(angleCube, 1.0f, 1.0f, 1.0f);  // Rotate about (1,1,1)-axis [NEW]

   glBegin(GL_QUADS);                // Begin drawing the color cube with 6 quads
      // Top face (y = 1.0f)
      // Define vertices in counter-clockwise (CCW) order with normal pointing out
      glColor3f(0.0f, 1.0f, 0.0f);     // Green
      glVertex3f( 1.0f, 1.0f, -1.0f);
      glVertex3f(-1.0f, 1.0f, -1.0f);
      glVertex3f(-1.0f, 1.0f,  1.0f);
      glVertex3f( 1.0f, 1.0f,  1.0f);

      // Bottom face (y = -1.0f)
      glColor3f(1.0f, 0.5f, 0.0f);     // Orange
      glVertex3f( 1.0f, -1.0f,  1.0f);
      glVertex3f(-1.0f, -1.0f,  1.0f);
      glVertex3f(-1.0f, -1.0f, -1.0f);
      glVertex3f( 1.0f, -1.0f, -1.0f);

      // Front face  (z = 1.0f)
      glColor3f(1.0f, 0.0f, 0.0f);     // Red
      glVertex3f( 1.0f,  1.0f, 1.0f);
      glVertex3f(-1.0f,  1.0f, 1.0f);
      glVertex3f(-1.0f, -1.0f, 1.0f);
      glVertex3f( 1.0f, -1.0f, 1.0f);

      // Back face (z = -1.0f)
      glColor3f(1.0f, 1.0f, 0.0f);     // Yellow
      glVertex3f( 1.0f, -1.0f, -1.0f);
      glVertex3f(-1.0f, -1.0f, -1.0f);
      glVertex3f(-1.0f,  1.0f, -1.0f);
      glVertex3f( 1.0f,  1.0f, -1.0f);

      // Left face (x = -1.0f)
      glColor3f(0.0f, 0.0f, 1.0f);     // Blue
      glVertex3f(-1.0f,  1.0f,  1.0f);
      glVertex3f(-1.0f,  1.0f, -1.0f);
      glVertex3f(-1.0f, -1.0f, -1.0f);
      glVertex3f(-1.0f, -1.0f,  1.0f);

      // Right face (x = 1.0f)
      glColor3f(1.0f, 0.0f, 1.0f);     // Magenta
      glVertex3f(1.0f,  1.0f, -1.0f);
      glVertex3f(1.0f,  1.0f,  1.0f);
      glVertex3f(1.0f, -1.0f,  1.0f);
      glVertex3f(1.0f, -1.0f, -1.0f);
   glEnd();  // End of drawing color-cube

   // Render a pyramid consists of 4 triangles
   glLoadIdentity();                  // Reset the model-view matrix
   glTranslatef(-1.5f, 0.0f, -6.0f);  // Move left and into the screen
//   glRotatef(anglePyramid, 1.0f, 1.0f, 0.0f);  // Rotate about the (1,1,0)-axis [NEW]


   glutSwapBuffers();  // Swap the front and back frame buffers (double buffering)

   // Update the rotational angle after each refresh [NEW]
//   anglePyramid += 0.2f;
   angleCube -= 0.15f;
}

/* Called back when timer expired [NEW] */
void timer(int value) {
   glutPostRedisplay();      // Post re-paint request to activate display()
   glutTimerFunc(refreshMills, timer, 0); // next timer call milliseconds later
}

/* Handler for window re-size event. Called back when the window first appears and
   whenever the window is re-sized with its new width and height */
void reshape(GLsizei width, GLsizei height) {  // GLsizei for non-negative integer
   // Compute aspect ratio of the new window
   if (height == 0) height = 1;                // To prevent divide by 0
   GLfloat aspect = (GLfloat)width / (GLfloat)height;

   // Set the viewport to cover the new window
   glViewport(0, 0, width, height);

   // Set the aspect ratio of the clipping volume to match the viewport
   glMatrixMode(GL_PROJECTION);  // To operate on the Projection matrix
   glLoadIdentity();             // Reset
   // Enable perspective projection with fovy, aspect, zNear and zFar
   gluPerspective(45.0f, aspect, 0.1f, 100.0f);
}

/* Main function: GLUT runs as a console application starting at main() */
int main(int argc, char** argv) {
   glutInit(&argc, argv);            // Initialize GLUT
   glutInitDisplayMode(GLUT_DOUBLE); // Enable double buffered mode
   glutInitWindowSize(1040, 580);   // Set the window's initial width & height
   glutInitWindowPosition(50, 50); // Position the window's initial top-left corner
   glutCreateWindow(title);          // Create window with the given title
   glutDisplayFunc(display);       // Register callback handler for window re-paint event
   glutReshapeFunc(reshape);       // Register callback handler for window re-size event
   initGL();                       // Our own OpenGL initialization
   glutTimerFunc(0, timer, 0);     // First timer call immediately [NEW]
   glutMainLoop();                 // Enter the infinite event-processing loop
   return 0;
}
Share:

BTemplates.com

Buscar este blog

Archivo del blog

Con la tecnología de Blogger.